Clubs

Showing posts with label Technique. Show all posts

Wednesday, September 4, 2019

Thank You cards

Thank You!

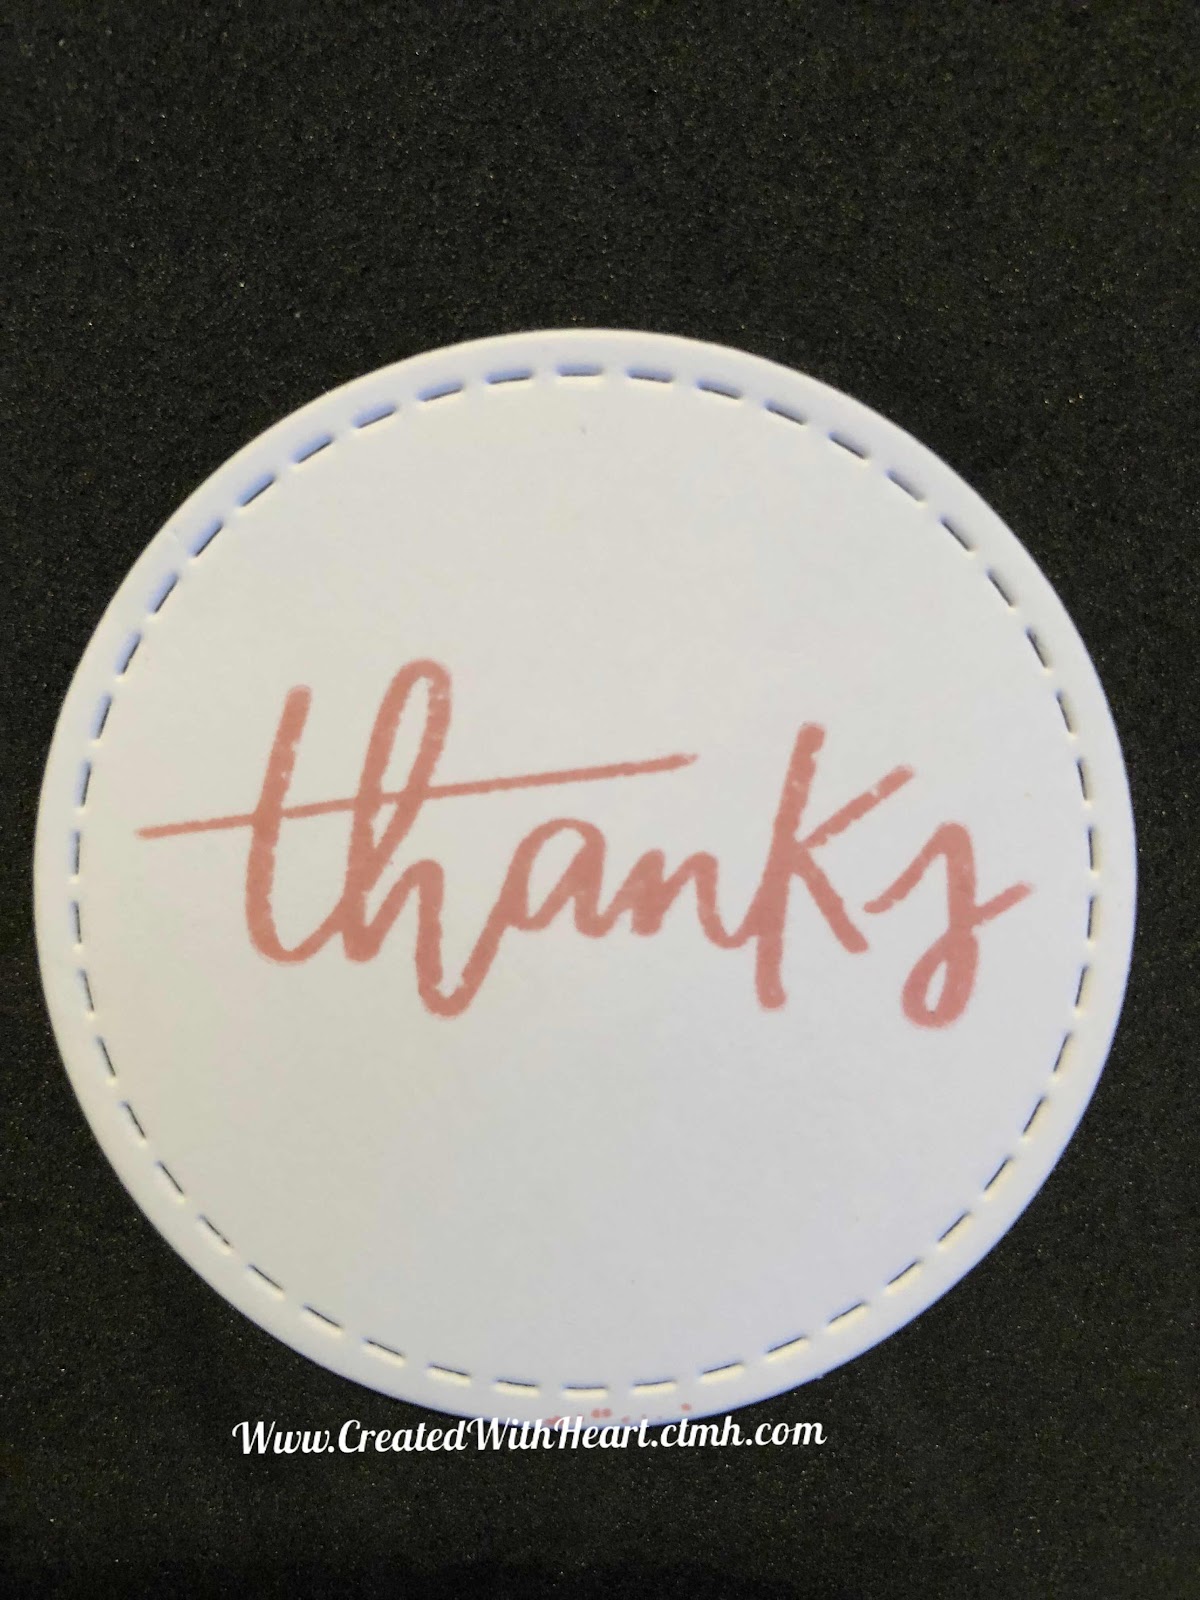
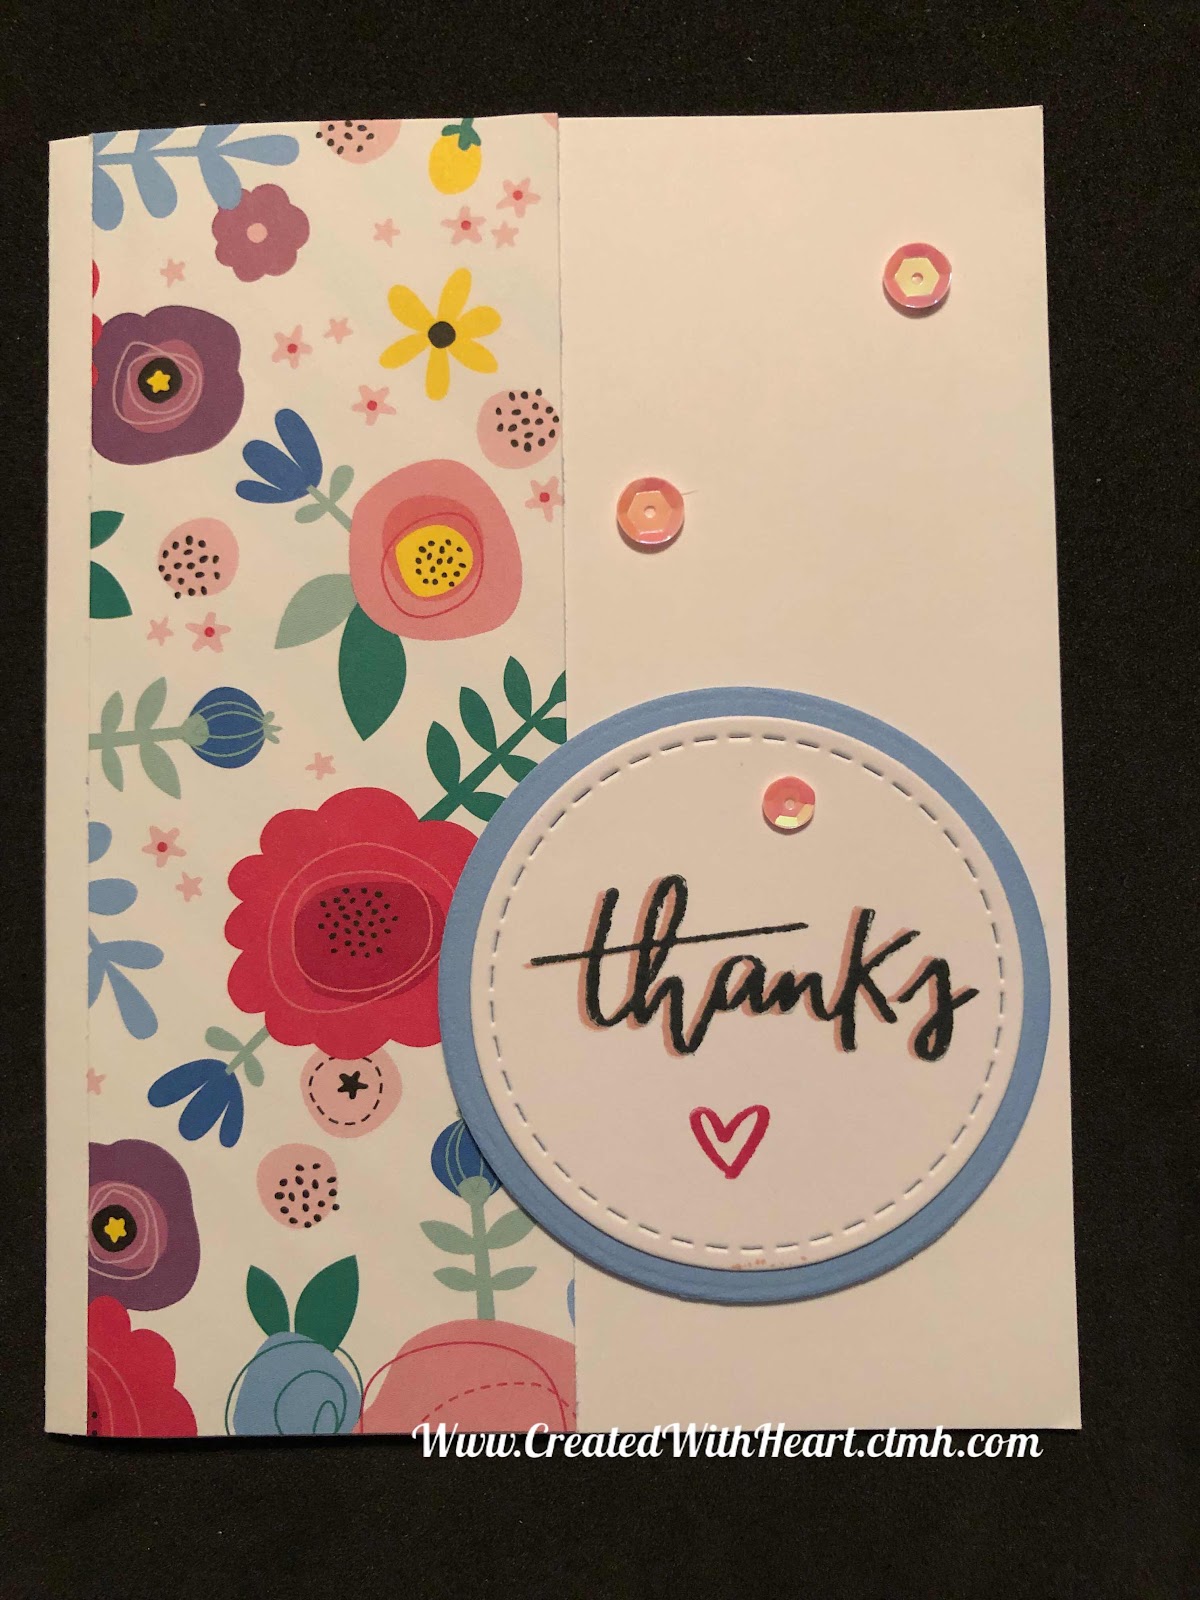
Here is a card that I have been sending to those who have shopped with me recently. It has a fun little technique that is SO easy!


I popped up the sentiment and added some fun little sequins.

Here is the technique:
Stamp the first color (I do the lighter color on the bottom and stamp it first)


Then stamp the second (Darker) Color over the first and slightly off to the right .
The lighter color makes a fun little shadow effect and also POps the sentiment a little.


Here is another sample:


It really is quick and easy, give it a try and I would love for you to comment and let me know how you like it! Add a picture too!

Remember to Create it with Heart,
Debi

Saturday, December 15, 2018

Love of Color - CTMH Technique Blog Hop

Love of Color - CTMH Technique Blog Hop


Thank you for joining us on this Blog Hop with lots of ideas and tips for you while using the terrific thin cuts.. A Blog Hop is a 'circular' group of Blogs that you 'Hop' to (or click the link to) that will give you lots of tips, techniques and inspiration for the topic of the Blog Hop.  I hope you enjoy your time with us and enjoy the projects.
If you came from Haley Dyer's Blog you are on the right track!

Here is my project for today:

I don’t know about where you live, but here in Texas it is starting to look like Winter! So I think about Blue and Gray colors for my Winter projects which I’m sure is why I picked Mink as the color I wanted to use. The 4 color choice I chose includes: Mink Pewter, Carolina and Sapphire. I really like this color combo!
If you know my Husband and I, we get into astronomy a little, so if you hang out with us for a while you will likely spend a night looking at the stars! So of Course this stamp set, Friends are like Stars, really appeals to me!
Here is what I came up with:

I made two versions, the first is a little fun as I stamped the stars in Sapphire on the white ribbon:


The second is me I used the Mink Twine with a double Bow:


I also ad0ded Clear Shimmer to the stars and dots (hard to see in a picture):


Leave me a comment and let me know which one you like the best!

I hope your winter is looking good!

Hop on over to Wendy Kessler’s Blog to enjoy more great projects.

Thank you for stopping by and until next time, Create it with Heart,
Debi

Thursday, November 15, 2018

Shake Things Up! - CTMH Technique Blog Hop


Shake Things Up! - CTMH Technique Blog Hop


Thank you for joining us on this Blog Hop with lots of tips and ideas for you. A Blog Hop is a 'circular' group of Blogs that you 'Hop' to (or click the link to) that will give you lots of tips, techniques and inspiration for the topic of the Blog Hop.  I hope you enjoy your time with us and enjoy the projects.
If you came from Haley Dyer's Blog you are on the right track!

Here is my project for today:


Isn’t this little hedgehog so adorable!?! This card is really quick and easy to make with the Round foam and acetate from Close To My Heart!! I stamped the hedgehog and colored him with Shin Han markers.
I used the fern stitched ribbon on the top edge.


Hop on over to Wendy Kessler’s Blog to enjoy more great projects.


Thank you for stopping by and until next time, Create it with Heart,
Debi

Saturday, September 15, 2018

Sew What?! - CTMH Technique Blog Hop

Sew What?! - CTMH Technique Blog Hop


Thank you for joining us on this Blog Hop with lots of ideas and tips for you while using the terrific thin cuts.. A Blog Hop is a 'circular' group of Blogs that you 'Hop' to (or click the link to) that will give you lots of tips, techniques and inspiration for the topic of the Blog Hop.  I hope you enjoy your time with us and enjoy the projects.
If you came from Haley Dyer's Blog you are on the right track!

Here is my project for today:
I love the Boutique Cardmaking Workshop Your Way! So...I just changed it up a little! The cards are so fun and easy to put together!


To make this card, I put the 3/4" strips of pattern paper from the kit across the front of the card diagonally and cut off the ends.


Then I stamped the Heart image from the kit (in Sugarplum and then rolled the edge in Saffron - have to say I haven't used this color much but it made a great pop of color for this card) and cut it out with the Stitched Heart Thin Cuts.


I can now 'sew' my Silver Embellishing Thread through the stitches that the Thin Cut left:


Back side:

All that's left is to stamp the sentiment and little stitches at the bottom of the sentiment piece in Charcoal Ink, tie a bow on the heart and add some Bitty Sparkles (I did use Thin Foam Tape to pop up the sentiment piece).


I know you can't see how sparkly it is on the photo, but maybe this close up will give you an idea:


Sew Easy! Adding the thread to the heart did take a couple of minutes, but SO worth it!

Ask your Consultant about the products above. If you don't have a Consultant I would love the opportunity to earn your business. You can contact me here or if you are ready to shop, you  can visit my website here.

Hop on over to Wendy Kessler’s Blog to enjoy more great projects.

I’ve also been playing with the Stitched Borders Stamp Set on envelopes:


I have another Small project on Monday with the Silver Embellishing Thread if you'd like to stop back by then. If you would like it to come to your email then just go on the right side and enter your email into the Follow by Email box and Submit.

I love to know how you like my projects and would love for you to leave a comment below.

Wednesday, August 15, 2018

Purposeful Plastic - CTMH Technique Blog Hop

Purposeful Plastic - CTMH Technique Blog Hop


Thank you for joining us on this Blog Hop with lots of ideas and tips for you while using the terrific thin cuts.. A Blog Hop is a 'circular' group of Blogs that you 'Hop' to (or click the link to) that will give you lots of tips, techniques and inspiration for the topic of the Blog Hop.  I hope you enjoy your time with us and enjoy the projects.
If you came from Michelle Loncar's Blog you are on the right track!

Here is my project for today:

I chose to make a Card  for a friend and use a small Flip Flap in my project, it’s a great way to hide a gift card, Ice Cream Card or even money!!


Let’s check it out:

Front of the card


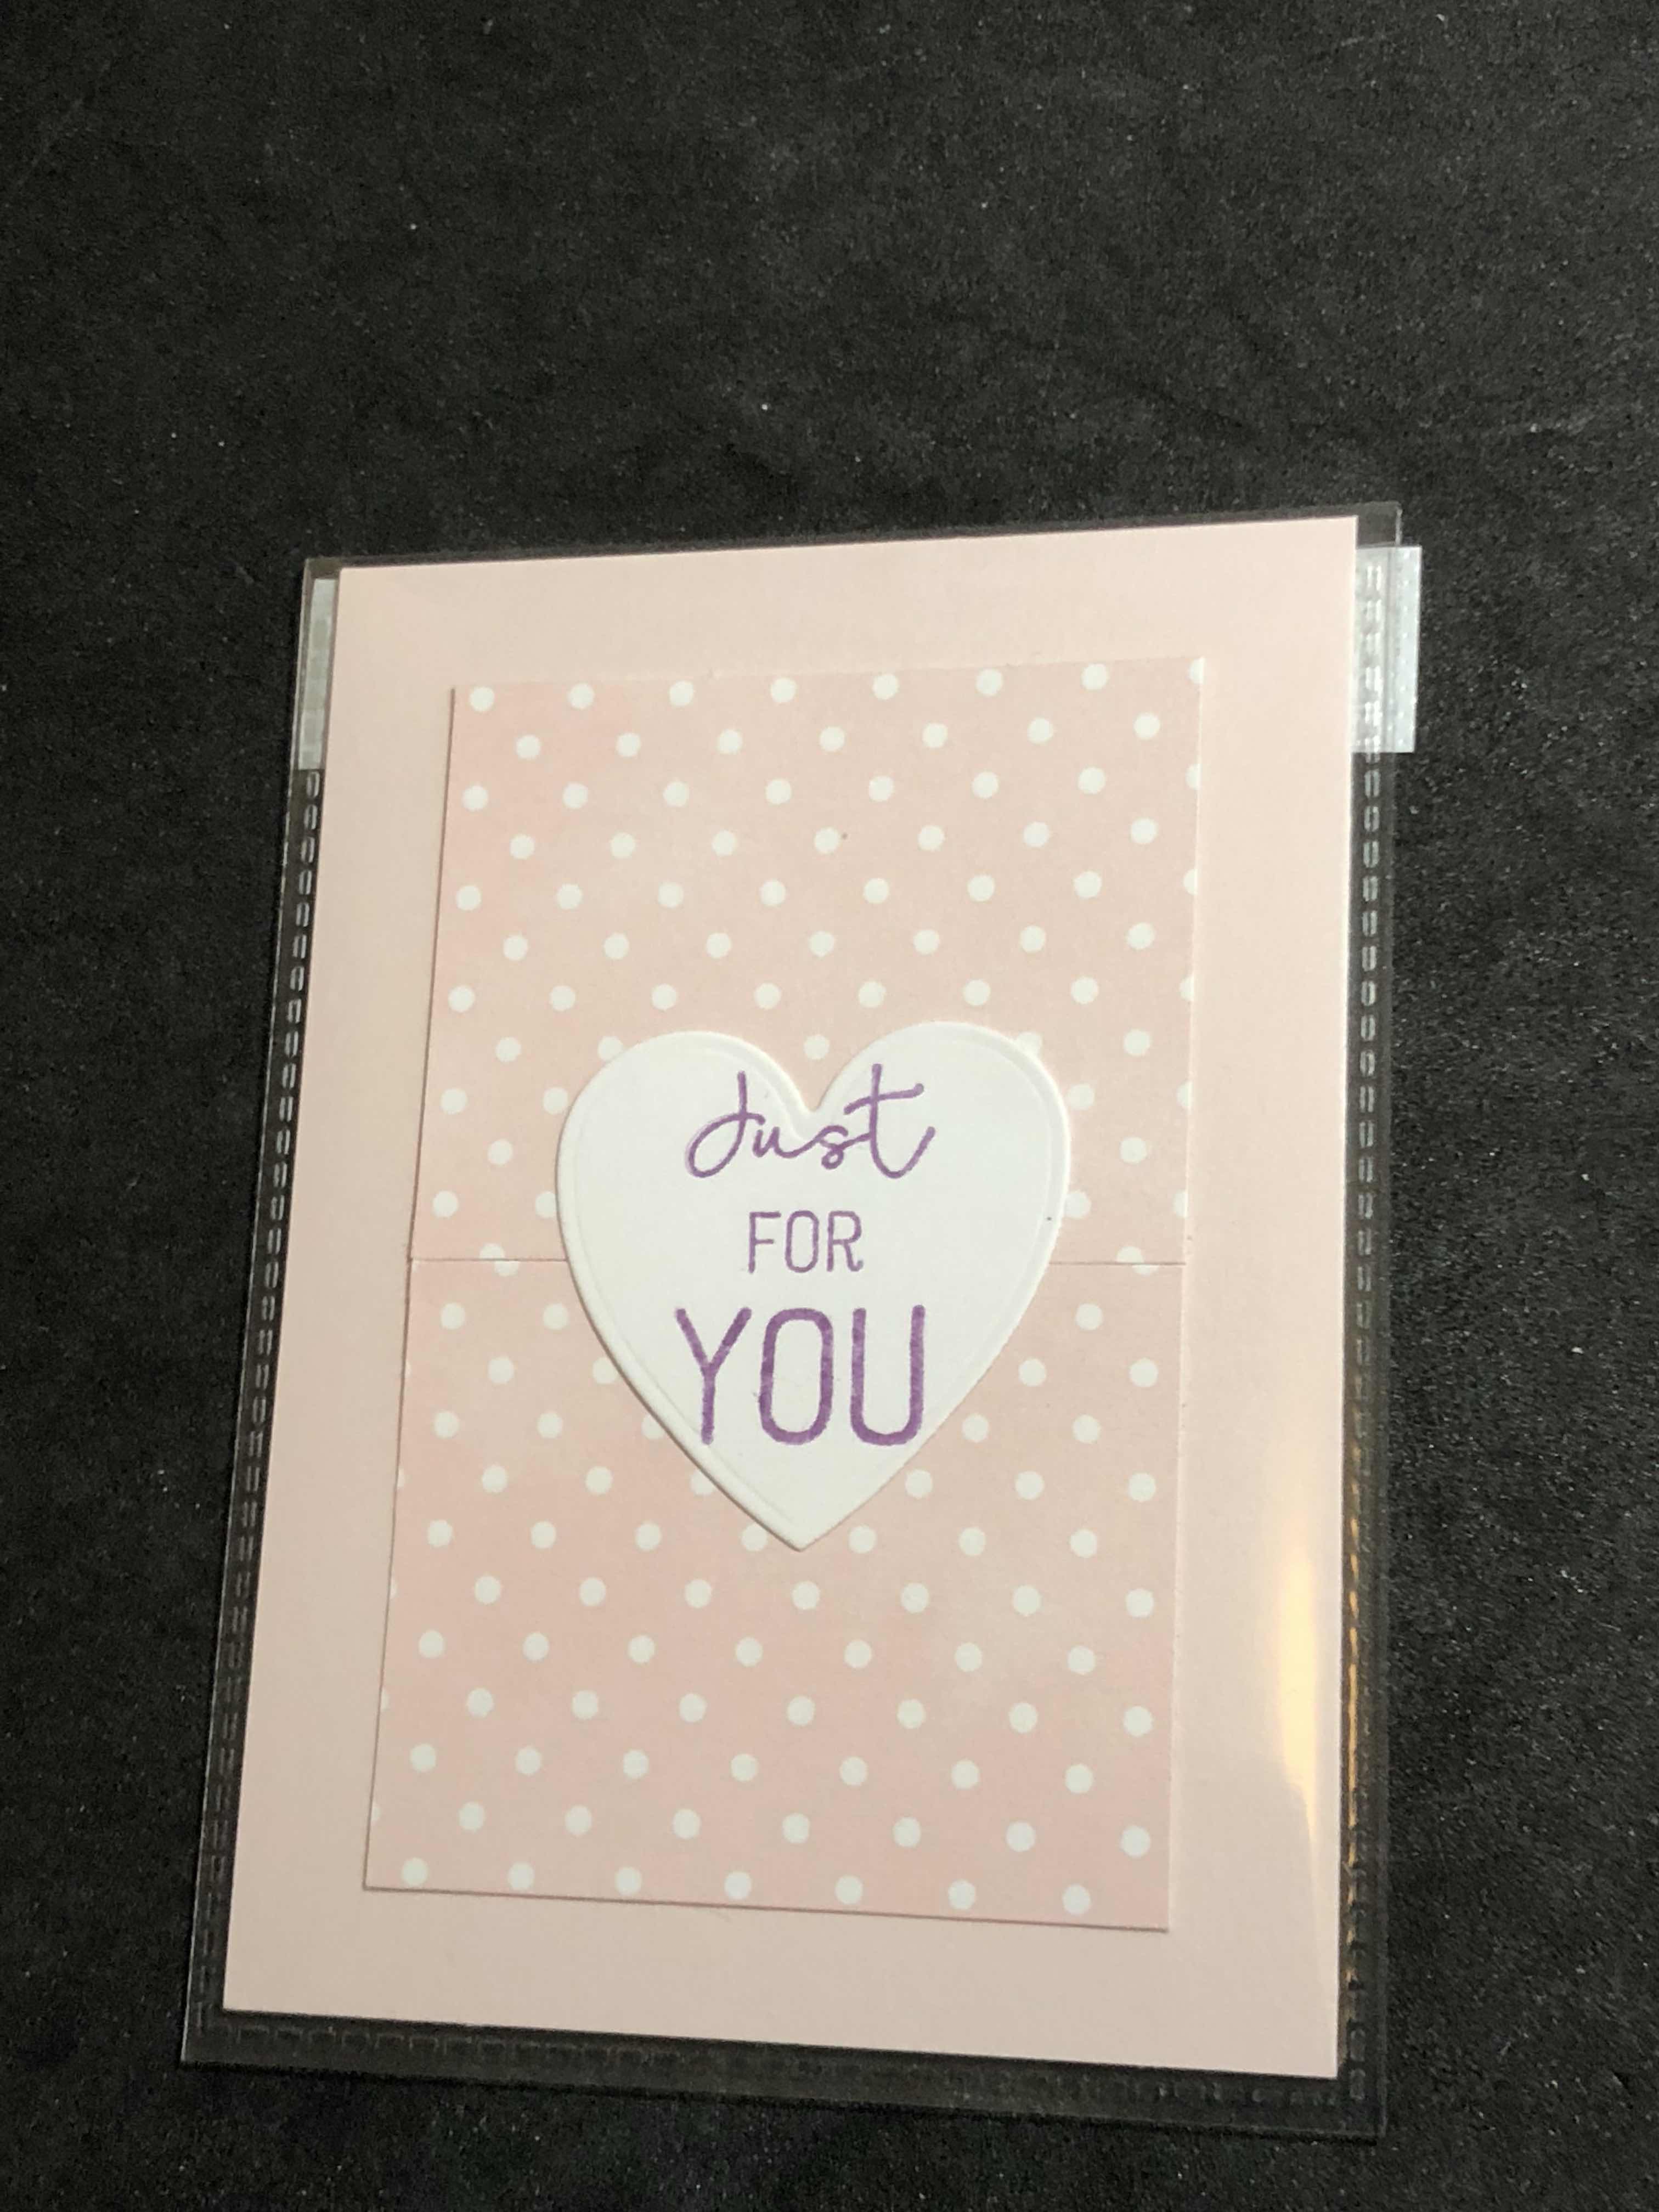
I used a 3 1/4 x 4 1/4” Flip Flap (the plastic sleeve shown here) and cut a piece of Cardstock to fit inside and decorated it:


I added a gift card to the back:


Then I folded the top flap behind the top of they flip flap, removed the plastic off of the adhesive and stuck it down on the card where I wanted it placed:


So when you lift it up you see the gift card and can remove it through the opening near the flap:


Flip flaps are SO easy to use, just insert the items (could be a journaled Card or Picture for a scrapbook page, baby’s hair from 1st haircut, gift cards, anything that will fit in them basically and we have LOTS of different sizes!


Talk to your consultant about getting some Flip Flaps! If you don’t have a consultant I would love a chance to earn your business (contact me 

here).


Hop on over to Catherine Farnsworth Nowak’s Blog to enjoy more great projects.


Thank you for stopping by and until next time, Create it with Heart,
Debi

Sunday, April 15, 2018

CTMH Technique Blog Hop - Creative with Cards

CTMH Technique Blog Hop - Creative with Cards


Thank you for joining us on this Blog Hop with lots of ideas and tips for you while using the terrific thin cuts.. A Blog Hop is a 'circular' group of Blogs that you 'Hop' to (or click the link to) that will give you lots of tips, techniques and inspiration for the topic of the Blog Hop.  I hope you enjoy your time with us and enjoy the projects.
If you came from Haley Dyer's Blog you are on the right track!

Here is my project for today:
Today I used the Summertime Picture My Life (PML) Cards. These are so fun and easy to use.


I used my scissors to cut out the tent scene and then I used the Circle Thin Cuts to cut out the sentiment of a small card:


After that, I sponged some Sapphire ink around the edge of my sentiment piece:


I added some of the Loght Grey Ribbon and Of course I had to add some Bitty Sparkles to help the stars shine:


I also like to use the PML cards (the journaling and plain cards that I can write on), to write a note on it and add it inside my customer Thank You Cards with one of the cute paper clips or retired Washi Tape so the receipient can remove it easily and use the card themselves;


These are also excellent for quick and easy scrapbooking! If you haven’t tried them yet, contact your consultant and get your hands on some and play with them. If you don’t already have a Consultant I would love to help you and answer any questions you have!
contact me here.

Hop on over to Darlys Recker’s Blog to enjoy more great projects.


Thank you for stopping by and until next time, Create it with Heart,
Debi

Thursday, March 15, 2018

CTMH Technique Blog Hop - Purposeful Patterns

CTMH Technique Blog Hop - Purposeful Patterns


Thank you for joining us on this Blog Hop with lots of ideas and tips for you while using the terrific thin cuts.. A Blog Hop is a 'circular' group of Blogs that you 'Hop' to (or click the link to) that will give you lots of tips, techniques and inspiration for the topic of the Blog Hop.  I hope you enjoy your time with us and enjoy the projects.
If you came from Haley Dyer's Blog you are on the right track!

Here is my project for today:


I am using Pattern 11 from the Make it from your Heart volume 4. This is a quick and easy pattern that I’m sure you are going to love using over and over as it is fun and simple but very good looking! I like that you can do really simple and not add much extra (as I did) or you can really dress it up.

Supplies I used:
Z3318 Basic Circles Thin Cuts 
Z3348 Scallop Border Thin Cuts
C1706 Easter Animals Stamp Set
X7230B Chelsea Gardens Paper Packet
X7230D Chelsea Gardens Coordinating Cardstock (Glacier and Sweet Leaf were used)
Z3361 Whimsy Ribbon Pack
X254 Value Pack (White card base and Envelope) 

Check out all the dimensions and tips (plus more artwork) by getting ya our own copy of this exciting new pattern book! Just contact Your Consultant and ask them about the Make it from Your Heart Volume 4.
If you do not have a consultant that you already work with, I would love to answer any questions you have and help you see if this is a good product for you, send me a message Here! You can also check out my website Here!

Hop on over to Darlys Recker’s Blog to enjoy more great projects.


Thank you for stopping by and until next time, 
Create it with Heart,
Debi

Monday, January 15, 2018

CTMH Technique Blog Hop - Blushing Backgrounds

CTMH Technique Blog Hop - Blushing Backgrounds


Thank you for joining us on this Blog Hop with lots of ideas and tips for you while using the terrific thin cuts.. A Blog Hop is a 'circular' group of Blogs that you 'Hop' to (or click the link to) that will give you lots of tips, techniques and inspiration for the topic of the Blog Hop.  I hope you enjoy your time with us and enjoy the projects.
If you came from Michelle Johns’ Blog you are on the right track!

Here is my project for today:


I used an acetate box from our ribbon packs, took off the label and wrapped Black Cardstock around the sides (I had to put two pieces together, which is why I made the White Daisy pieces smaller for each panel).


Then I put a piece of black and adhered the white panel to the top.
I stamped the White Daisy panels with B1572 Banner Love. This stamp set is made to specifically meant to stamp a background on the Tag Thin Cuts...SO much Fun!!
I popped the Heart on top with regular Foam Dots (gotta Love those!).
I used Dove Dark chocolate to fill the box.
I was going for a manly type box. I think he’ll like it!


I really like these background stamps, they are so fun and easy to use on bags, boxes, tags, letters, scrapbooking pieces and cards! I hope you like them too and check out our Idea Books to see all the great backgrounds you can make.
Hop on over to Danielle Wagner’s Blog to enjoy more great projects.


Thank you for stopping by and until next time, Create it with Heart,
Debi

Wednesday, November 15, 2017

CTMH Technique Blog Hop - Thin Cuts Craze

CTMH Technique Blog Hop - Thin Cuts Craze


Thank you for joining us on this Blog Hop with lots of ideas and tips for you while using the terrific thin cuts.. A Blog Hop is a 'circular' group of Blogs that you 'Hop' to (or click the link to) that will give you lots of tips, techniques and inspiration for the topic of the Blog Hop.  I hope you enjoy your time with us and enjoy the projects.
If you came from Darlys Recker's Blog you are on the right track! 

Here is my project for today:


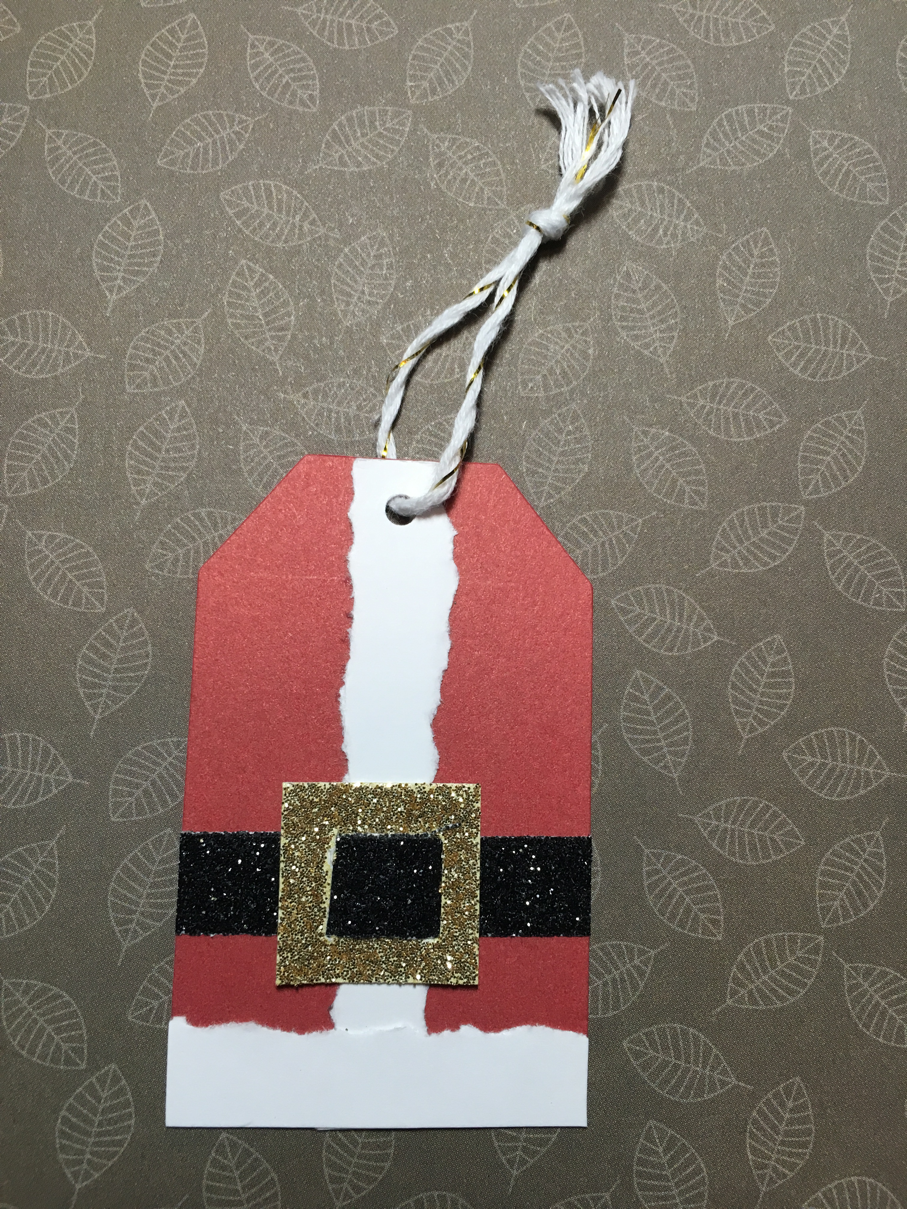
The Tag thin cuts are so much Fun and great for making Holiday tags!
I used the large size tag: (I stamped To and From on the back)


I cut two pieces of white Daisy Cardstock at 1/2 inch each ( long enough to fit on tag). 
I then tore off both sides the long way on the vertical piece and tore one long side of the horizontal piece.
I then adhered the long piece down the center of the tag and trimmed off any access. 
Next I adhered the other strip with the flat edge to the bottom of the tag and cut off access. 
I used a 1/8" hole punch to re-punch the hole. (See picture below).


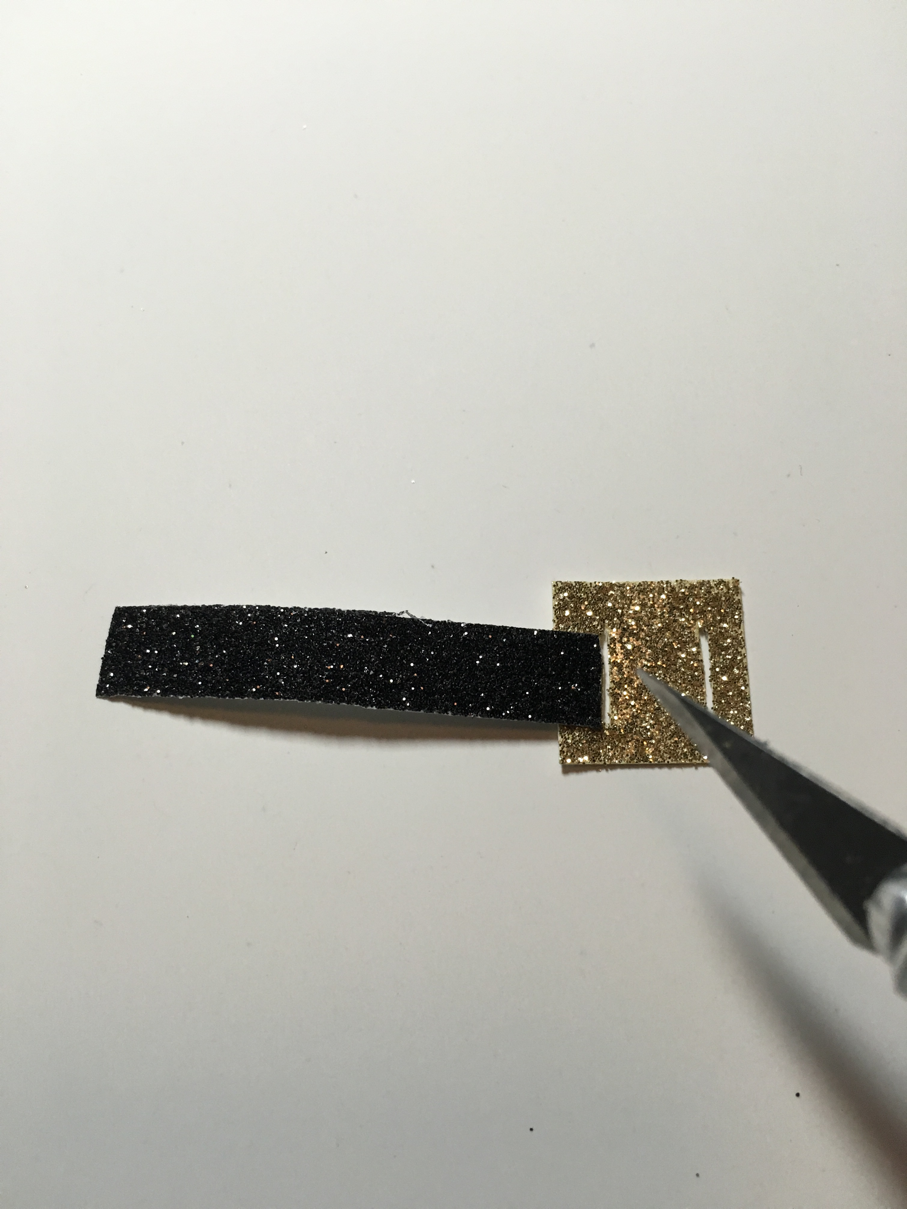
For the buckle, I used an exacti knife to cut two slits in which to thread the black shimmer trim thru. See below:


I took the backing off the shimmer trim and stuck it to the front of the tag and trimmed off the excess.


I used the Gold and white twine to make a loop for the top:


I hope you enjoy making your own Santa gift tags! Leave me a comment below and let me know how you like this project.

Hop on over to Sarah Devendorf's Blog to enjoy more great projects.

Thank you for stopping by and until next time, Create it with Heart,
Debi

Sunday, October 15, 2017

CTMH Technique Blog Hop - Terrific Tags

CTMH Technique Blog Hop - Terrific Tags


If you came from Darlys Recker's Blog you are on the right track! Thank you for joining us on this Blog Hop with lots of ideas and tips for you while using this fabulous new Foil Paper. A Blog Hop is a 'circular' group of Blogs that you 'Hop' to (or click the link to) that will give you lots of tips, techniques and inspiration for the topic of the Blog Hop.  I hope you enjoy your time with us and enjoy the projects.

Here is my project for today:

 I used the Tag Thin Cuts and cut out two of the largest tag from Falling from you pattern paper.
The tags weren't long enough to go over the mini tic tacs I had to put inside so I created a little 'open box' for them to sit in and put a zip strip (the piece cut from the top of the paper, approx, 1/2") on the bottom and them added the tags:


Then I took some White Burlap Ribbon and with my scissors cut up one of the areas between two strand and then all the strands come apart (be sure to run your fingers down the strands to get rid of the excess fivers), and tie into a bow (add your mini tic tacs first - found at Dollar Tree near registers).

Then decorate as desired.


These make great little gifts for friends, co-workers, teachers or Sunday school classes. You could even put names on them for seating at Thanksgiving or a party. So much fun!

Hop on over to Belinda McLane's Blog to enjoy more great projects.

Here are the measurements:
For box:
2 X 5 Cardstock
Score (with long side butted up against trimmer edge):
1, 1.5, 3, 3.5

Score short side at:
1/2"

Zip Strip cut at 5.25"

Cut Large tag from Basic Tags Thin Cuts (Z3344)

Cut the box tabs on the bottom edge of box, up to 1/2" score line (you are cutting only 1/2" between each score mark). You can miter the edges if you like.
See second photo above. Adhere back of box, large flap will completely cover small (1") flap. Adhere bottom flaps to complete box.

Place Zip strip around bottom edge of box, a small portion will stick out, just cut it off flush with box.

Place Mini Tic Tacs (found at Dollar Tree):


Then place a tag on each side of box, butted up to the top of zip strip.
Add ribbon and Enjoy!

Thank you for stopping by and until next time, Create it with Heart,
Debi


Thank You cards

Thank You! Here is a card that I have been sending to those who have shopped with me recently. It has a fun little technique that is SO easy...