Thank
you for joining us on this Blog Hop with lots of ideas and tips for you
while using the Chelsea Gardens paper.. A Blog Hop is a 'circular' group
of Blogs that you 'Hop' to (or click the link to) that will give you
lots of tips, techniques and inspiration for the topic of the Blog Hop.
I hope you enjoy your time with us and enjoy the projects.
If you came from Shirley Ross's Blog you are on the right track!
Here is my project for today:
Here is my project for today:

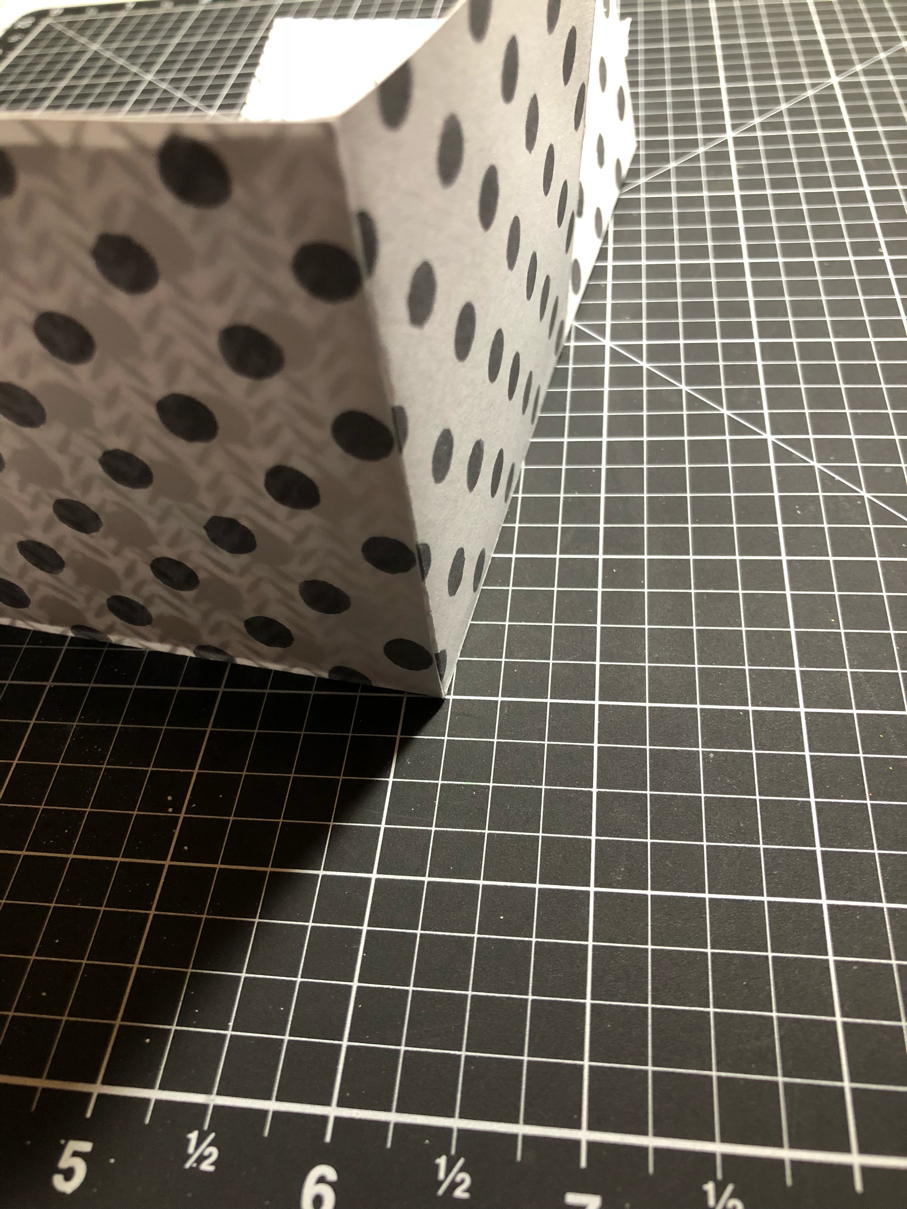
I was going for a manly box that would be good for a Valentine gift.
I also made it with the scallop edges, SO Cute!

Cut paper 9x9 and score at 3” all around

I cut up two opposing sides and metered each as well as cut a bit off each end (ONLYon the corners, so they fit inside your box nicely).

Then adhere corners inside your box being sure to line them up at the corners.
The scallop top is put together the same way with the difference of using the Scallop border Thin Cut to cut the edges before adhering together.

Place the Cardstock through the middle of the thin cut with the scallops on top (you only want to cut the scallops out, not the entire border), placing them at the edge of each side to cut.
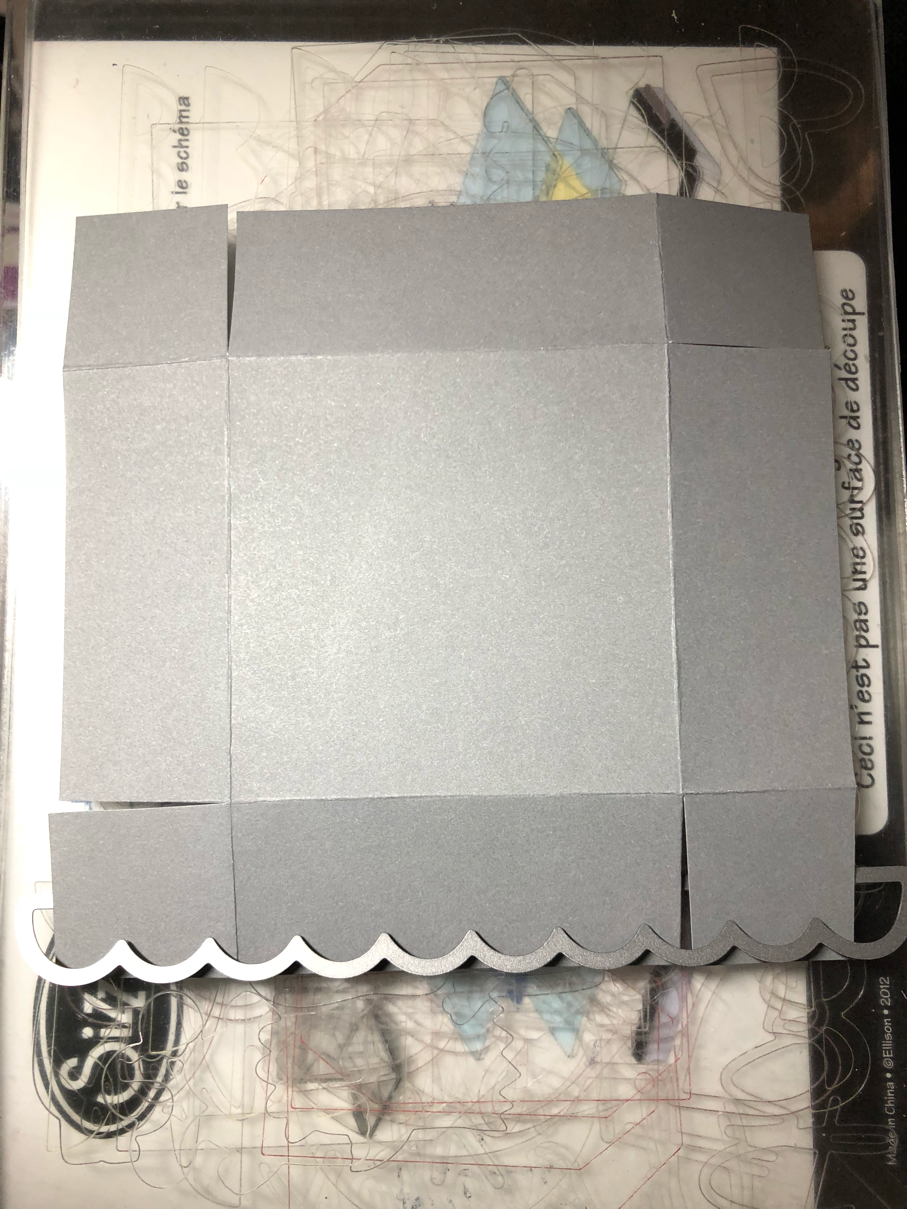
It looks a little funky when it comes out....one tip: be sure to cut the end off before adhering so it doesn’t show through your scallops (this May be easier to do before you cut the scallops, or as you adhere each corner so you know which side to cut).

I wanted to keep this simple for a guy, so I added the Whisper extra thick twine along with a tiny Thin Cut Basic Tag stamped in Ruby with the CO from the ‘I made this’ stamp set.


I’m sure the new Light Grey Ribbon would be perfect also!
I hope you enjoyed this project.
Hop on over to Julie Scott’s s Blog to enjoy more great projects.
Thank you for stopping by and until next time, Create it with Heart,
Debi


What a great tip on the scallop border. I didn't think I needed that Thin Cut, but now I do!
ReplyDeleteCute box. I love polka dots!
ReplyDeleteThat is a really cute project!
ReplyDeleteI LOVE this cute box and appreciate you listing the tutorial for any of us to make it too! Thanks!!
ReplyDeleteLove your project and the tutorial is awesome.
ReplyDeleteGreat tutorial & love that it's a bit masculine.
ReplyDelete