Clubs

Showing posts with label Card. Show all posts

Friday, February 15, 2019

Lovely Layers - CTMH Technique Blog Hop

Lovely Layers - CTMH Technique Blog Hop


Thank you for joining us on this Blog Hop with lots of ideas and tips for you on layering.. 
A Blog Hop is a 'circular' group of Blogs that you 'Hop' to (or click the link to) that will give you lots of tips, techniques and inspiration for the topic of the Blog Hop.  I hope you enjoy your time with us as well as the projects.
If you came from Hayley Dyer’s Blog you are on the right track!

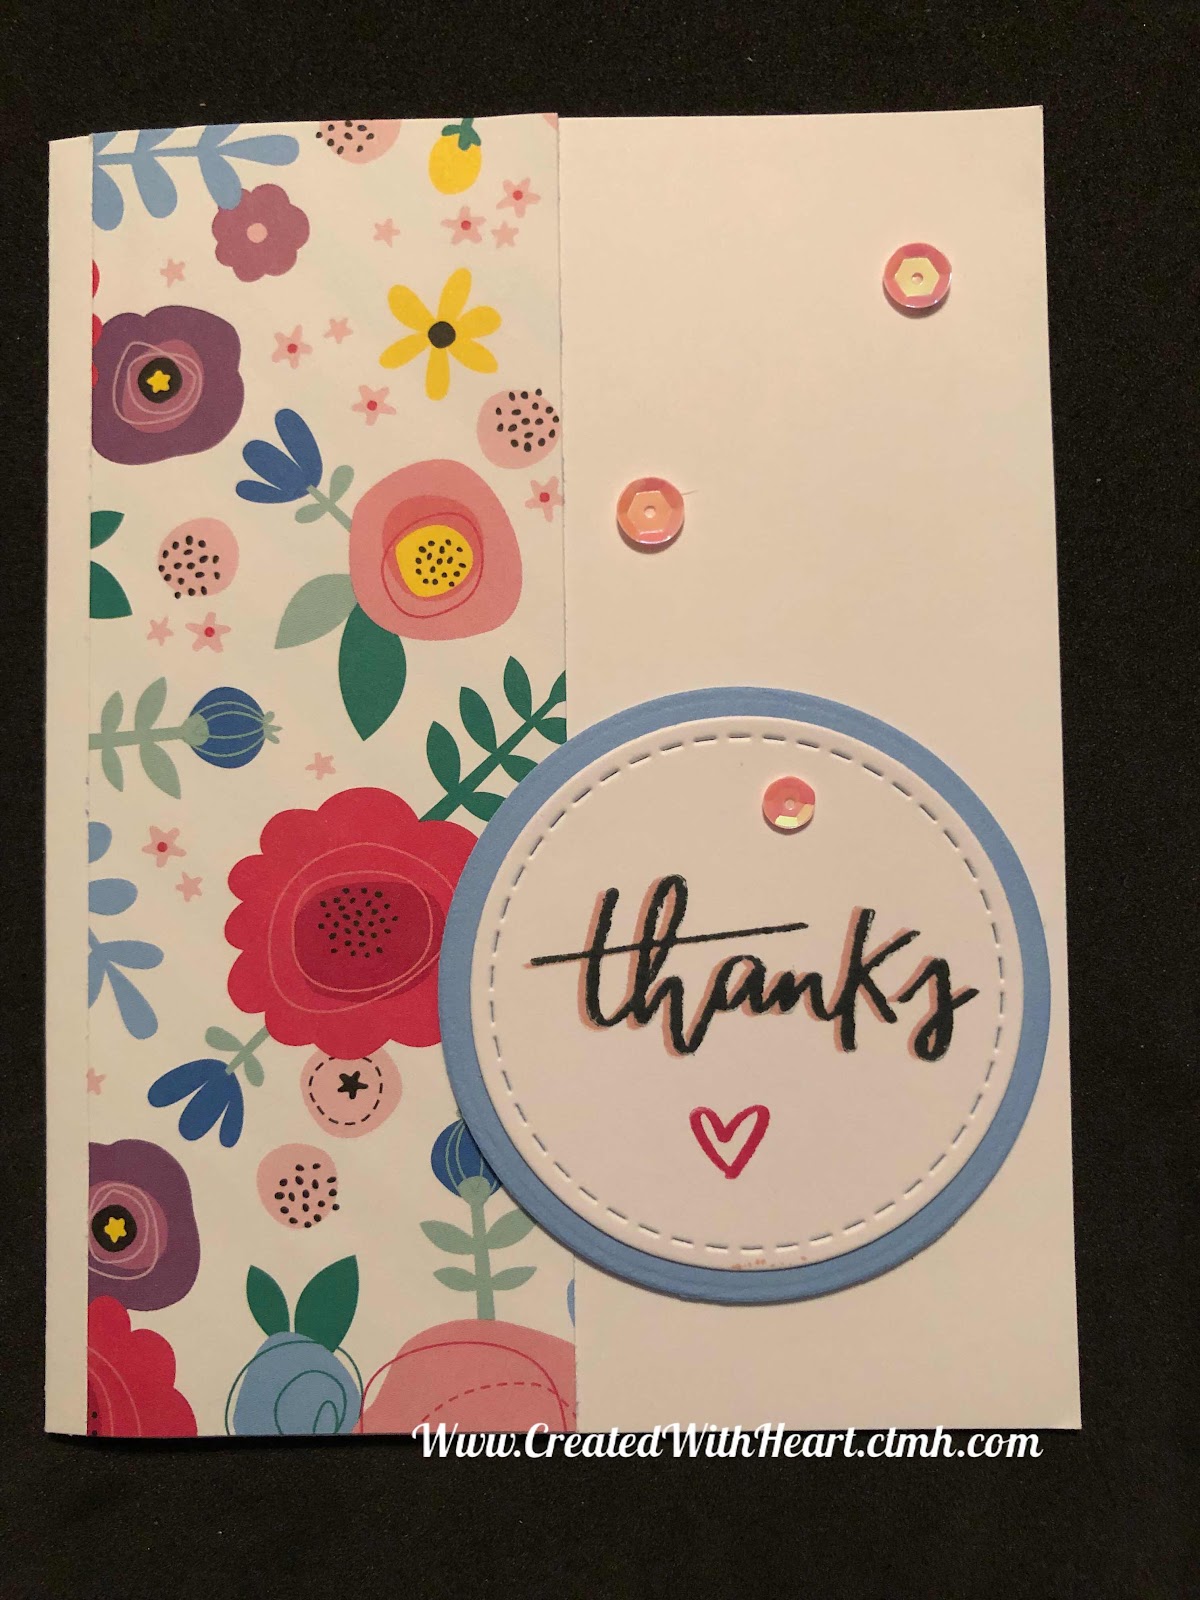
I took the route of layering the paper, pattern and cardstock, to get my layered look.

Here is my project for today:


I really loved the Dinosaur stamp set as soon as I saw it and living by places where we can go see Dino tracks and Dinosaur World was another great reason to get them so I can finish our scrapbook pages! Today I made a Birthday card with one of them.
I adhered the clover light side cardstock at the top of the card and the dino track pattern paper at the bottom of the card, then layered it with a zip strip (piece you cut off the top of the pattern papers) which I had layered on twine with the mini stapler.
I then stamped my dinosaur in pewter ink, layered that on top of the background stamped in pewter ink and adhered that to the light side of pewter cardstock and layered the entire piece on the card with foam tape.


The second image I layered a lot of the same way except I put foam tape at the top end of the balloon to layer the embellishing thread behind it and also so it looks like it is floating off the card (the bottom of the balloon is adhered with tombow so it lays flat against the card which also allowed me to stamp the balloon string over the bottom of it and going off the edge of the card).

Please ask your consultant for mire information on our awesome pattern papers and cardstocks! If you don’t have a consultant I would love the chance to earn your business, contact me or visit my website for pictures and pricing for the current products offered Here.

Hop on over to Darlys Recker's Blog to enjoy more great projects.

I hope you enjoyed these projects!
I love to know how you like my projects and would love for you to leave a comment below.

Thank you for stopping by and until next time, Create it with Heart,
❤️ Debi


Sunday, January 20, 2019

Heart Happy Blog Hop


Thank you for joining us on this Blog Hop with lots of ideas and tips for you.. A Blog Hop is a 'circular' group of Blogs that you 'Hop' to (or click the link to) that will give you lots of tips, techniques and inspiration for the topic of the Blog Hop.  I hope you enjoy your time with us as well as the projects.
If you came fro Becca Whitham’s Blog you are on the right track!

I was in need of a bag for a friend’s gift that I will give soon and this kit is just the ticket!
So here is my project for today:


I cut a piece of the Background and Texture Paper 11 1/2 x 9”, I scored the 11 1/2” side (this is butted up to the edge on the trimmer) at 4, 5 1/2, 9 1/2, 11”, then scored the 9” side at 1 1/2 and 7 1/2”. I also cut the paper (a few flaps off top, one corner off bottom and trim the bottom flaps up to the score line) to look like this:


I rounded the corners on the flap, adhered the 1/2” strip to the inside of ‘back’ of bag, adhered bottom flaps and just squished in the sides to close:


I am just using Tombow to close the bag, you could also use a Velcro circle if you want it to open and close again:


Just decorate and inset a fun gift! The bags are fun and easy to make! This paper and extras that come with it are so pretty and fun to play with! I hope you have as much fun as I am!

Hop on over to  Brenda Lapp’s Blog to enjoy more great projects.

If you like this kit (it really is great), then contact your Consultant. If you don’t have a Consultant I would love to help you out...you can see the different papers, stamp set, embellishments and stickers or even purchase it here. You can contact me here with any questions.

Thank you for stopping by and until next time, Create it with Heart,
Debi

Tuesday, January 15, 2019

Tag, You’re It! - CTMH Technique Blog Hop

Tag, You’re It! - CTMH Technique Blog Hop


Thank you for joining us on this Blog Hop with lots of ideas and tips for you.. A Blog Hop is a 'circular' group of Blogs that you 'Hop' to (or click the link to) that will give you lots of tips, techniques and inspiration for the topic of the Blog Hop.  I hope you enjoy your time with us as well as the projects.
If you came from Haley Dyer’s Blog you are on the right track!

I have needed some Sympathy cards for a while now, I am behind with things at the moment (It’s just the way my ball bounces)! So I thought this was a good stamp set to use, I just adore it!
Here is my project for today:


I used the Feels like Home paper pack, the Tag Thin Cut set, Charcoal Ink, Sage Ink (applied with water brush) and Sugarplum Ink. I also used the White Ribbon and Silver Embellishing Thread.
I am going to make a 5 x 7 version and see how that looks too!

Hop on over to Daryl’s Recker’s Blog to enjoy more great projects.

Thank you for stopping by and until next time, Create it with Heart,
Debi

Wednesday, October 4, 2017

How about some Chrtistmas Tunes?

The exclusive stamp set special for October is Christmas Tunes. Here are two of the stamps, the snow globe and the Christmas tree:


Aren't they so Cute!?! I am SO ready for the cooler weather to get here! So simple and elegant fun for Christmas.

You can view the entire stamp set on my website here. We will definitely be having fun with this set during the month!

This set is available ONLY October 1-31, 2017 and ready to purchase on my website for $17.95 OR you can purchase $50 in products and get this special stamp set for only $5.00. That's a great deal!

Item number S1710, set of 7
Recommended Blocks:
Y1003 (2x2)
Y1009 (2x3 1/2)
Y1012 (4x5) 
 4¼" x 5½" Snow Globe Card - a Vertical card base Supplies:

S1710 My Acrylix® Christmas Tunes—October Stamp of the Month
X7225B Beary Christmas Paper Packet
1385 White Daisy Cardstock
Z2831 Charcoal Exclusive Inks™ Stamp Pad
Z1263 Bitty Sparkles
Z3364 Basics Ribbon Pack
Z3132 Watercolor Paints
Z3226 Waterbrush—Medium Flat
Z3293 Shimmer Brush—Clear
Z1151 3-D Foam Tape

5" x 7” Happy Holiday Card - a Vertical card base Supplies:

S1710 My Acrylix® Christmas Tunes—October Stamp of the Month
X7225B Beary Christmas Paper Packet
1385 White Daisy Cardstock
Z3239 Silver Glitter Paper
Z2835 New England Ivy Exclusive Inks™ Stamp Pad
Z1263 Bitty Sparkles
Z2448 ShinHan™ Touch Twin™
Carmine Marker
Z3293 Shimmer Brush—Clear


I hope you enjoyed the cards above and I will be back with more of this set during the month!
Until next time, Create it with Heart,
Debi

Supplies can be purchased from your Consultant (if you don't have a Consultant, I would love to earn your business! You can visit my shopping site Here! You can check out the catalog online there and send me an email/comment below for any questions I can help you with).

Friday, March 17, 2017

Happy Day


Happy St. Patty's Day!

I hope you have good luck in all your adventures today!

You can make this card with:

5 1/2 x 8 1/2" card base, fold in half with opening to the right hand side
5 x 3 3/4" Topiary cardstock
5 1/4 x 3 1/2" White Daisy Cardstock
Crichton cut Clover
Thin Foam Tape
Sentiment stamp(s)


Fold card base in half with opening to right side.
Adhere Topiary green Cardstock to center of card front.

Using Topiary Inkpad, stamp Sentiment in lower center part of of White Daisy Cardstock (see sample.
Adhere this piece to center of card front.

Adhere Pear (light green) clover to middle of Topiary clover and adhere this piece with Thin Foam Tape to upper center of White Daisy Cardstock (see sample).

Decorate inside of card and envelope as desired.


Have a great day and remember to Create it from the Heart!
Debi

Monday, September 5, 2016

CTMH Paper Blog Hop - Jeepers Creepers


Welcome to our Jeepers Creepers Blog Hop! If you came from Katy's Blog, you are on the right track. We hope you enjoyed all the creative goodness everyone had to share this month!

The Jeepers Creepers paper pack is SO FUN! I'm not that big on Halloween but this paper can be used for SO many other things too! That being said...I just love the spooky eyes paper! I just had to use it on a card!

My card uses the Spooky eyes paper cut at 5 1/2 x 4 1/4" (be sure to watch the direction of the eyes when cutting the paper). Adhere this piece to the front of a White Daisy card base.

Next cut a piece of Pansy Cardstock at 4 1/2 x 3 1/4" and adhere to center of card front.
Cut a piece of White Daisy Cardstock at 4 1/4 x 3" and before adhere to card front add your compliment stickers...
I cut the striped border in half and placed about a 1/4" from the top edge and bottom edges
Place the little monster sticker in the middle and adhere the White Daisy piece to center of card front.
Add Puffy Eye stickers on top of the little monsters eyes.
Embellish inside of card and envelope as desired.

Here's my card front:

You can see here where I added the dimensional eyes:


Suggested inside message:
'I See'...
           You're having a Birthday!
           You're doing a great job!
           It's time to Celebrate!

There are lots of sayings you can use, just think about what you are celebrating! I hope you like this little project and that you can see this set is Fabulous for Fun projects other than Halloween! I think the little monsters stamp set is awesome for young boys birthdays!

Here are the products I used:
G1110 Workshop Your Way Jeepers Creepers (includes the pattern paper, Compliment Assortment (with Stickers), Cardstock and Assortment pack (puffy stickers)
X254 White Value Pack Cards and Envelopes

Be sure to check out the matching Thin Cuts and Stamp Bundle as well as new ink colors!
If you already have a consultant please shop with them. If you do not have a consultant I would be happy to help you and earn your business. To order with me click here and choose September Orders. Let me know if you have any questions!

To go to the beginning of the blog hop or to continue on your journey, go to Melissa's blog

Until next time, Create it with Heart.
Debi

Thank You cards

Thank You! Here is a card that I have been sending to those who have shopped with me recently. It has a fun little technique that is SO easy...